Showing posts with label Canvas. Show all posts

O Christmas Tree!

How I love your snow covered branches!


I needed a nice large size painting for the Christmas and Winter season, so I made one using Golden Fiber Paste and various acrylic paints. I used seed beads for the texture of the tree, and made a white snow out of cello flakes, glitter glue, and Tri-Art Liquid Mirror paint. The star is from the bead department at Joann's, and I used Precious Metals by Viva Decor. 


Follow your art


I feel like words will ruin the tranquility of this enchanting little 8x8 canvas. I spend a couple months every year, putting paint and texture on a variety of canvases, so I can later create something with it. I really loved the plain painted canvas. Layers and layers that I will one day post a walk through series of my process. Each canvas takes a week, sometimes two weeks to create. If you take into account that I cut then hand paint all the die cuts, then we are looking at a much longer process from start to finish. 


Precious Metal Color - Blackberry, Blue Azure, Gold


Fiber Paste scraped on smoothly, but allowing the texture of the canvas to show from beneath. I use cheap gold paint to highlight the areas I want to show, then the final touch is Liquid Leaf Gold for that rich metallic look.


Fly Away

The only thing I love more than a deep textured, mixed media canvas, is the die cuts I put on it. This is an 8x10 inch canvas, one of my first attempts at mastering the reflective nature and motion I desire. I gave in to the theme of the year, which was game pieces as words, but I like the way it looks. My favorite part of this piece is the Milky Way like stream down the center. I made this piece when Cheery Lynn Designs released their mini gears and cog set, which I cut out with metallic paper.


Really... you can add anything you have on hand. Just make it fluid, and love it when it's done.

Peacock Peace

Continuing with my Peacock journey, I created this little piece last year and gave it away as a gift. It is really very simple, but ornate. I don't really like the smaller pieces that are so popular these day, because I want my story to take over the entire wall. But they make wonderful little gifts!


This fun little canvas is 5x7, and I used the Spellbinders Jewel Fantasies and Jewel Keys die set, along with the Cricut Art Nouveau. I found a large earring at Joann's and used it for the feather. The label is cut with the Tim Holtz Tag & Bookplates die. I used metallic paints to color th eaccents, and jewels to fill the feather tail. I do love my die cuts!


Alluring

I went on a crazy peacock phase a couple years ago, then went on a cutting spree with my Cricut. Originally this was not going to be a hombre type painting, I switched gears half way through and decided the peacock in the tree needed a blue sky! This painting hangs in my hallway so I can see it when I come up the stairs. It sits under a solar light tube, so it reflects the sun off the glass in the sky. It truly is Alluring. The gold mica flakes simulate falling leaves.


 I love the reflective nature of the Shimmer paper by DCWV, and the mica flakes from Micheal's. The base paints are Lumiere fabric paint, also metallic, but then I use pretty much nothing else! The peacock tail is filled in with stickles by Ranger.


  The wings are a beautiful set from Cheery Lynn Designs. It is a left and right, large and small set, and I LoOOove them!! You can see the details yourself!


The Alluring is from a Tim Holtz Bigz Block Talk alphabet set, I cut multiple layers of chipboard and layered them for dimension. The paint is Viva Precious Metal Colour, a wonderfully expensive metallic paint that is rather difficult to find, but Joann.com sells most of the colors. 


I am ever so pleased with the clever use of re-purposed treasures for my pieces. The branch is the Tim Holtz Bird Branch die, that I cut out the packaging of the die, with the die. Then painted the underside with Viva Stamp Paint, which offers texture, and the top is glossy. Or you can flip it for the texture up, I go both ways. You can see where I built the tree out of the single branch die.


One of my favorite techniques is using Golden Gel Medium from Amazon or Michael's and mixing a batter of translucent beads and blue and green cello glitter. This mixture also contains blue and green beach glass that I smashed to bits. The silver tube beads are a bit like rain drops, but only if you are thinking that when you drop them in the batter!


 The gel medium acts as a glue, so it is a really valuable tool for working on canvas. The base is textured with Liquitex Natural Sand mixed with paint, then watered down metallic paint for the blended effect.


I linked the stores that I buy most of my materials from. 

Thank you for stopping by!!


Great Performance!

This was a fun piece to put together. At the time, the wings were new to me, and I was on a fanatic dress form spree. The week I made this one, an actor friend was having a performance at his school and I was inspired by the intrigue of it all. Jesse got a standing ovation from me! One day when he makes it big in Hollywood, I will always have this piece of him from the past. Yes, he's a guy and this is a girl thing...I did use blue...


You can find them at Michael's and Joann's stores, or here online.
The larger gear is from Cricut.com


Crafting Keeps Me Sane

I love the 8x8 canvas. They are so easy to work with because they are firm and tight, and there is no limit to what you can pile on. This piece was a sample board for various dies. It is all paint and die cuts, and die cuts I painted. I absolutely love die cuts more than anything else. I can cut paper for hours, so I have drawers of organized cuts. Cathartic I suppose.


If you like the look and options of this particular flower or rose, I would find the die as soon as possible because it is retired for some reason. It is a steel rule die and it cuts out nice felt flowers too. Sizzix.com should have some new options, I added a link to Amazon down below. Don't forget to ink the edges! 


I used an 8x8 canvas which is nice and manageable. I find they are difficult to get my hands on, but now I know to buy a bundle when they are available, and on sale. I buy all my canvas from Michael's when they have their fabulous Artist Loft canvas packs on sale. Girlie Grunge Labels word art.


The background is much more difficult to describe. I used Lumiere fabric paint - Indigo because it is so dark and flexible. I bought it on Joanns. While I was there, I also grabbed the metallic blue Viva Decor Precious Metal Color in various icy blues. And to keep it the marbled effect, I also used basic metallic craft paint that I buy when I go to Michael's.
When the paint dries, I add mica flakes using a really high quality Golden acrylic Polymer Medium, Gloss. The Mica Flakes are by Stampendous, and found at Michael's, Joann's, and Amazon.


Spellbinders - Shapeabilities Venetian Motifs 


Tommy

This is my best friend when he was probably two years old. His grandfather worked on cars and was the Sedro Woolley fire chief for ages. I love the photo on top, because I always imagine what he was saying to his grandson at his kitchen table in Sedro Woolley, WA.


Grandpa Tommy, and his grandson Tommy.


We have a variety of Tim Holtz Alterations dies. The gear set, Word Play alphabet, mini old jalopy.


There is a large piece of acetate cut with a Spellbinders, grand size circle die. I rubber stamped gears and cogs on it to give it a very dimensional look. The idea is that it is digital media brought to life. It is very subtle. but it mats the entire circled section. The bottom of the acetatate is stamped with StayzOn ink, and the top is sprayed with black webbing spray.


Spellbinders circles and sprightly sprockets by Donna Salazar.


Tim Holtz Ornamental Sizzix die, and Stampers Anonymous. 


The center is an expensive laser cut chipboard piece. I can not recommend using them because they are incredibly fragile to paint on. 


This is the Tim Holtz Alterations picture wheel die. I scanned a black cut out and extracted it from the background into a PNG file. Then I took a series of photo's to the time, and placed it in a template to insert behind the picture wheel, which is cut out with chipboard, and coated with a rust and patina process.


I uploaded a small gift for you, if you would like to make a picture wheel yourself. Please see my free downloads page and look for the black template that is the scanned image of an actual die cut. There is also a block mask that you can clip your photo to in photoshop.


Thank you for stopping by!

The Family

This is one of my favorite photo's of my dad and his two brothers and sister. My father is the little cutie on the top right, "Freddie". This canvas was inspired by the hardship my grandmother faced while raising four children at such a young age, in the aftermath of the Great Depression. Their father was not around much and she had to fend for herself, carving out a pattern of survival skills that I have found invaluable during the last few years of my own personal hardships. Remember the stories your grandparents tell you, because they are trying to teach you something!


I chose this quote because we take our hits, then we dance on.


This is a laser chipboard cut, and the butterfly is a Spellbinders die cut, and various metal findings.


The bird and branch is a Tim Holtz Alteration die, bird branch. I cut it out with chipboard, then layered it for depth. My grandmother loved the birds.


The cogs are another Tim Holtz Alterations die, and a few metal pieces placed strategically. The fence is a laser wood cut from Michael's. The grass is a Cheery Lynn Designs die cut that I painted with texture paint.  


My grandmother had the all American home when I was growing up. Simple and maintained with love. She didn't have a fence, but she had a beautiful enclosed patio. I aspire to have one of my own.

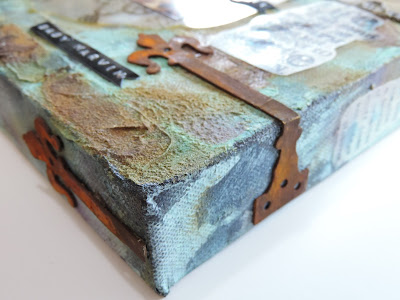
The paint is a real rust and patina paint and solution. I then stenciled on a brick texture using fiber paste and a brick template stencil. After that cured, I applied a new layer of rust and patina.


More hardware findings by Tim Holtz Alterations. Cut out with chipboard and painted, then soaked in a tub of activator solution and enclosed and shaken on occasion until I was satisfied with the depth of color.


The quotes are stamped with Stampers Anonymous stamps, by Tim Holts. I can't read the side poem anymore! I used StazOn ink on acetate, then adhered with Crackle Accents glue.


The knob is packed by Tim Holtz, and dropped in the tub of solution with the hinges, gears, cogs, and metal accents.


I will have one more 12x12 thick canvas that I will post next.

Thank you for stopping by!