Light Switch Plates

I am especially excited about these switch plates. My whole house looks "scrapbooky" but I love it! It is impossible to find nice plates for such a variety of switch types. It was pure happenstance that I had a decorative Spellbinders die that fit the 3 switch plate so perfectly. My home is "unique"!


I put them in the main living areas, as well as the bathroom which gives it a nice designer look. 


It took a couple days to work out the kinks. I used Prima Marketing papers in the 6x6 stacks because the images are smaller and you can get more of the pattern on them. I used acrylic stamps for a couple plates because I can't get enough detail, or positive support in my house. I sealed the bunch with Mod Podge a few times, just to make sure they didn't get ripped up and damaged. We are a wild and unruly bunch here.


Thrift Store Upcycle

I found this really cheap, fake wood table at a thrift store for $14. It took a lot of work, but I prepped the surface by lightly sanding it, then gave it a primer coat. I applied a lot of layers of iron paint to it and left it in the rain for a while to give it a really old look. It still needs handles, but I can't decide to actually order the specialty size online. Hobby Lobby doesn't have the right size handles. It was easier to get a tetanus shot than to take the time to seal it nice and proper. The sealing process takes some of the depth of color away. I'll get to it.


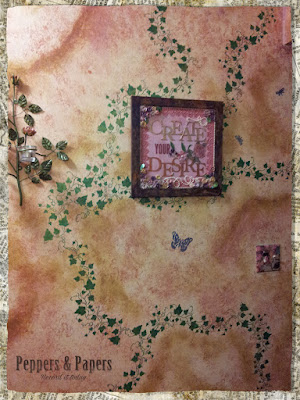
Create your Desire

I am a huge fan of subliminal persuasion, and having simple phrases on my wall helps me get through the day. Build the life you dreamed of. I don't know about you, but I need daily reminding that it is ok to pursue my dreams.

Get in your studio and CREATE!


Sizzix aplhabets Serif Essentials and Block Talk. Embossing powder and random stamps from Michael's   Flower dies by Impression Obsession and Sizzix. Frame has a 12x12 opening that fits scrapbook paper perfectly; from the Craft Warehouse. Martha Stewart craft paint- champagne and penny. Rust effect is Modern Masters paint.

Peace Layout

This is my mom when she was six months old. Her grandmother was not known for her warm fuzzy lovey-dovey tenderness, possibly to do with chronic illness that left her with one arm. People say "Ah! You have the Iverson chin!" Which is always insulting because that is code for double chin or flabby jowls...not something that you want people to tell you that you inherited, if you know what I mean. But not to me...nobody would dare say that to ME. *wink*


 I always hate to ruin my pretty pictures with lots of technical stuff, but you simply MUST know that I used spellbinders Decorative Fleur de Lis Rectangles for the mat because it reminds me of the white picket fence.


This is a word cut out from Michael's. I painted it with Lumiere paint, Halo Pink Gold...I simply LOVE it!! Bright and metallic.


Who doesn't love to use the Tim Holtz label dies? This is the one that came on the big tag die. I layered it and used a label maker for the names.


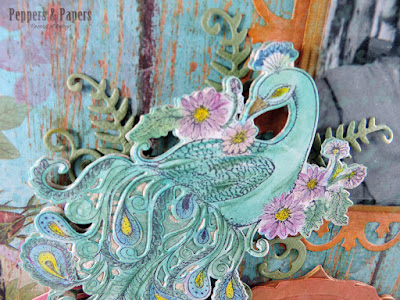
Heartfelt Creations, feathery peacock collection. It is a stamp and die cut set, then you color it. I used random colored pencils and pens.


 Heartfelt Creations, feathery peacock collection


And finally, the mastery process! I had a few stacks of the mat board from Hobby Lobby before they discontinued it. I cut it out with my Cricut using the deep cut blade and some full page label type shapes. Then sanded the edges before I adhered pattern paper on both sides. Then one more coat of paint to seal the edges so they don't fray. The idea is like a wall hanging, or a decorative plate. Self standing and durable, yet lightweight. I will be selling a ton of substrates in my Etsy store before to long.


Thank you for stopping by!

Old Curiosity Shoppe


Several years ago I bought a trunk full of mache boxes for $2 each. They are really nice quality and have longevity on their side. I used Graphic 45 paper, and the base is Martha Stewart festive green paint.


The wings are Cherry Lynn Designs, as well as the mini gear. The doll body is from the Spellbinders Mixed Media Playtime set.


Remembrance Card

I made a series of Remembrance Cards after my grandmother passed away. It was a very difficult time because I was already enduring other losses. I poured through my scans of my grandmothers old pictures, and found stages of her life that I felt meant something to her. I cropped them and put them on sheets to send to the printer. I remember walking to the pharmacy to pick up the prints, and the cashier said she knew my grandmother and was sorry to hear she had passed. I lost it. It was all I could do to pay the bill and get out. Once I complete the cards, and a couple digital layouts that I will post on another page, I felt a sense of closure. I think it helped the recipients as well. Loss is so difficult to endure, even when you anticipate the outcome. At the time, I felt like I could keep her forever, if I could just create something lasting. 


The inside has her personal information.


The birds are from a Sizzix border die. The flourish is Cheery Lynn Designs, the big flowers are Tim Holtz tattered florals, and he small flowers are Spellbinders Bity Blossoms. 


  The doily is Cheery Lynn Designs, also outlined with gold marker. 


The frame is from a Hero Arts set by Sizzix. I embossed it in a patina embossing powder by Judikins, and outlined it with a gold marker.


  The corners are also Cheery Lynn Designs, also embossed with a patina embossing powder. 

One of my cleanest work spaces EVER.


Thank you for stopping by!

Rusty Laugh

These chipboard wall hangings are so amazing to work with. They are tedious in their process because you have to get in the grooves, and don't forget to do the back too! They are made of layered chipboard, which I found at Hobby Lobby on sale for about $3. They make really great gifts because they don't take up space, and who doesn't love a positive subliminal message to plant in their mind every day? My house is filled with handmade subliminal persuasion. That's how I stay positive in the midst of all my personal hardships.


This is a quick view of part of the rusting process. You seal your substrate with the primer, then paint on one coat of the black iron paint and let dry. Then you paint on another coat, and while that is still wet, you strategically dampen it with the activator solution. I get my results from a pooling effect. Some kits come with spray bottles, but I find that doesn't give me what I want. I want it to look a thousand years old! After that dries, I cheat and wet it with water, and add a spotty layer of black iron paint again, then soak that with more solution. I usually do multiple pieces at once so I can stack them on top of each other. That is how I get the added texture. The process takes a few days if you want it to have this level of erosion. Once the rust is taken hold, I start to add the bronze and gold paint for the patina to show through. If you don't have the patina, the piece looks really orange and pure rust. Personal choice!


Tommy

This is my best friend when he was probably two years old. His grandfather worked on cars and was the Sedro Woolley fire chief for ages. I love the photo on top, because I always imagine what he was saying to his grandson at his kitchen table in Sedro Woolley, WA.


Grandpa Tommy, and his grandson Tommy.


We have a variety of Tim Holtz Alterations dies. The gear set, Word Play alphabet, mini old jalopy.


There is a large piece of acetate cut with a Spellbinders, grand size circle die. I rubber stamped gears and cogs on it to give it a very dimensional look. The idea is that it is digital media brought to life. It is very subtle. but it mats the entire circled section. The bottom of the acetatate is stamped with StayzOn ink, and the top is sprayed with black webbing spray.


Spellbinders circles and sprightly sprockets by Donna Salazar.


Tim Holtz Ornamental Sizzix die, and Stampers Anonymous. 


The center is an expensive laser cut chipboard piece. I can not recommend using them because they are incredibly fragile to paint on. 


This is the Tim Holtz Alterations picture wheel die. I scanned a black cut out and extracted it from the background into a PNG file. Then I took a series of photo's to the time, and placed it in a template to insert behind the picture wheel, which is cut out with chipboard, and coated with a rust and patina process.


I uploaded a small gift for you, if you would like to make a picture wheel yourself. Please see my free downloads page and look for the black template that is the scanned image of an actual die cut. There is also a block mask that you can clip your photo to in photoshop.


Thank you for stopping by!